Making a Digital Negative
The first stage is to prepare your black and white image from the original digital file. I always shoot in RAW format as this gives the best possible rendition and the most information for subsequent manipulation.
I bring all digital images into Adobe Lightroom first and do the bulk of the image processing there. When I’ve achieved an image that I know will print well conventionally (in this case I mean print directly from Lightroom on to paper) then I will export it from Lightroom as a 16-bit greyscale TIFF file at full size. This typically results in a file size of around 70MB from my Nikon NEF format originals. This TIFF file is then opened in Photoshop.
Once in Photoshop, adjustments can be made. These include the addition of a contrast adjustment curve suited to the printer, material and subsequent
process intended; the adjustment of the overall gamma value of the file before reversal; and finally, tonal reversal of the image. You should, in addition, include a standard ‘step wedge’ grey-scale and can also add a background surround to frame the image if you wish.
Equipment notes: I use Macs, but the technique described here will work pretty much identically on a PC. I run Adobe Lightroom 2.5 and Adobe Photoshop CS4. My printer is an Epson Stylus Pro 3800, using Epson Ultrachrome inks. Dialogue boxes and screens shown may differ from those in other software releases.
I experimented with both the DB and MW methods. I also studied the Ron Reeder method (one of the most thorough descriptions available for free, but specifically for the Epson 3800 printer). In the end I found I was using a combination of them all, plus some ‘seat-of-my-pants’ processing of the negative image.
The abhorrence of curve adjustments in MW’s method is acknowledged (by him) to be a bit misleading, as the use of Levels is actually a backdoor way of applying a curve, but with less flexibility. MW does in fact suggest that a curve may also be applied at the user’s discretion, to fine-tune the tonal levels in shadow and highlights. This is what I ended up doing to achieve the desired result.
DB uses curves, as does RR, and these are derived through density measurements made with either a densitometer or via a scanner. They can also be made by trial and error, but at the expense of a few more sheets of precious OHP film.
The way I decided to proceed, after making some tests using each of the methods cited, was to add five layers to the imported TIFF file, which was also converted to a Layer itself. These were:
- A Layer filled with Black behind the main image layer
- A Layer containing a step wedge (borrowed from the DB method and available for download from his site, link above)
- A Levels Layer, where the Gamma is adjusted to 2.2
- A Curves adjustment layer, to fine-tune the tones in the shadows and highlights
- A Curves layer that reverses the image tonally (a PS preset, Negative (RGB), same as Image>Adjustments>Invert)
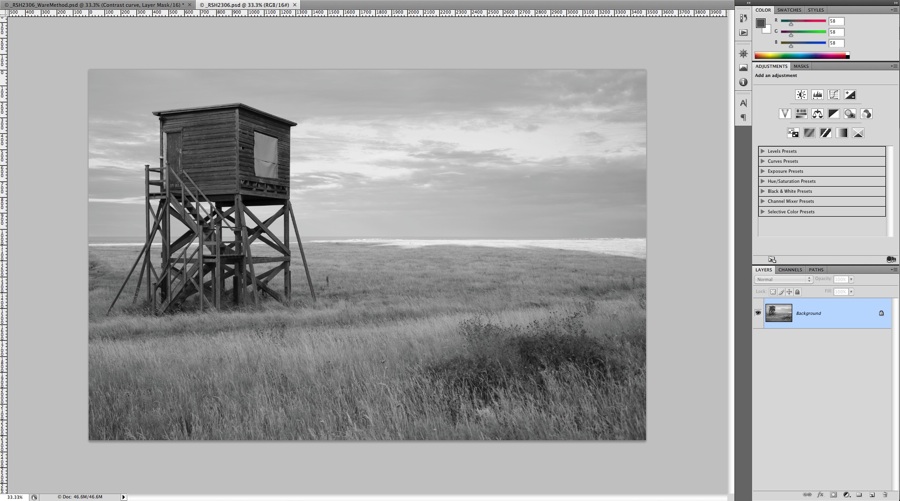
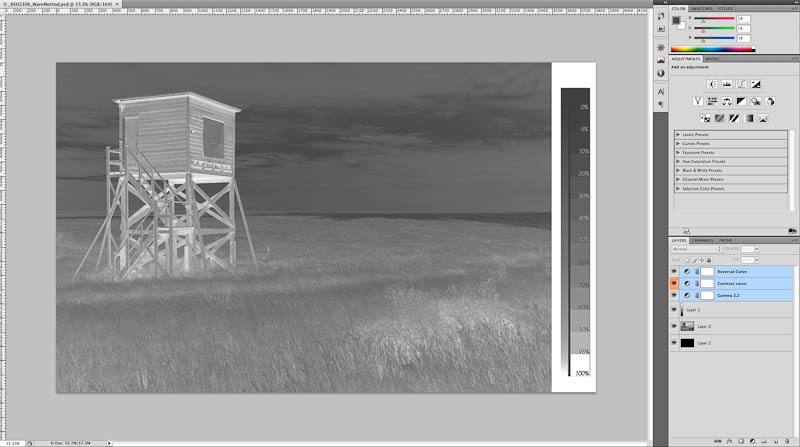
1 & 2. The imported file with the black background and step wedge inserted, all other layers turned off. The Canvas was extended to the right before dragging in the step wedge, which I’ve borrowed from the DB method.

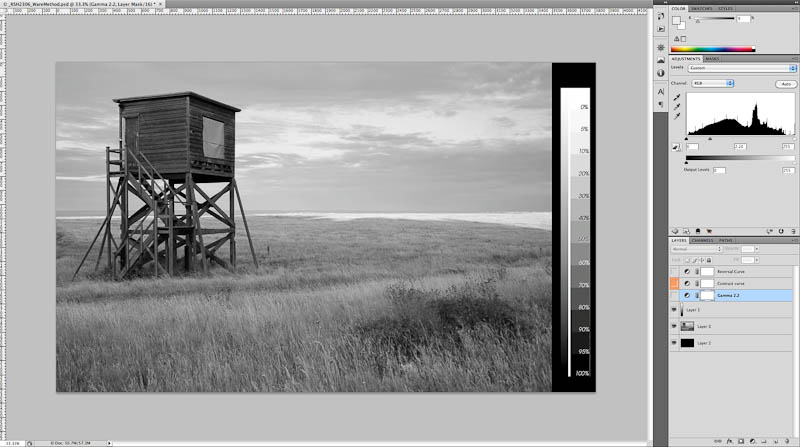
3. The Levels layer is adjusted to give a Gamma of 2.2, using the central slider only. The image looks far too light as a positive, but will change soon.
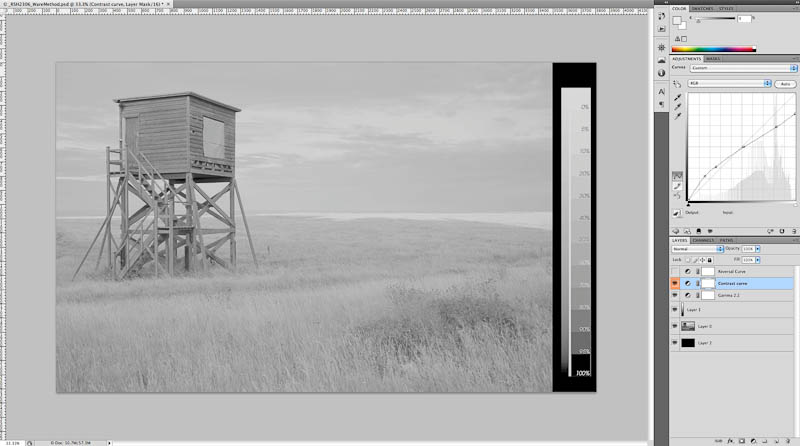
4. The curves adjustment layer makes the image appear quite low in contrast. This curve setting is based on tests I’ve made and differs somewhat from the suggested curve provided with the DB method. The highlights have been reduced in brightness, the shadows increased in brightness slightly. Bear in mind that the curve is affecting the image after the gamma setting has been made; the gamma levels should be turned off if you want to make adjustments to this curve by eye.

5. The reversal curve is shown here, but not applied yet. It merely switches the tonality without making any adjustments to it. You could do exactly the same with a layer that uses the ‘Invert’ preset in Photoshop.
6. The reversal curve applied. The image now looks more like a conventional film negative, just as it should, as it now ready to print.