Making the Contact Print
When the negative has printed, I leave it on its card support for 24 hours to dry thoroughly before placing it into a protective envelope or printing it.
I’m not going to go into the detail of how to print the negative onto photographic paper as this is well documented in many other places. I will make a couple of observations from my experiences though.
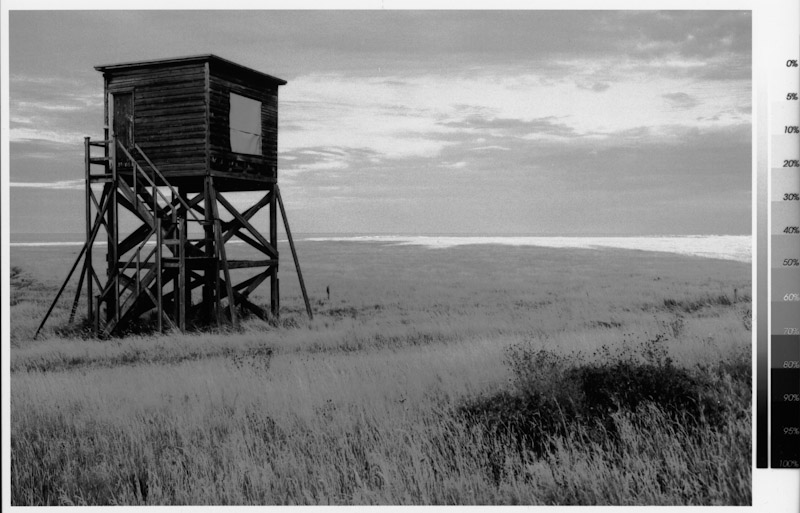
Before embarking on making a ‘fine print’ or any alternative print processing, I make a draft contact print on resin-coated variable contrast paper, using a Paterson contact frame (the plain glass type) with an enlarger as the light source. If the negative has been prepared correctly, it should print with Grade 2 filtration, but the availability of different grades can be useful to correct minor contrast deficiencies. Here’s an example of the print made from the negative prepared using my own contrast correction curve (shown at right).
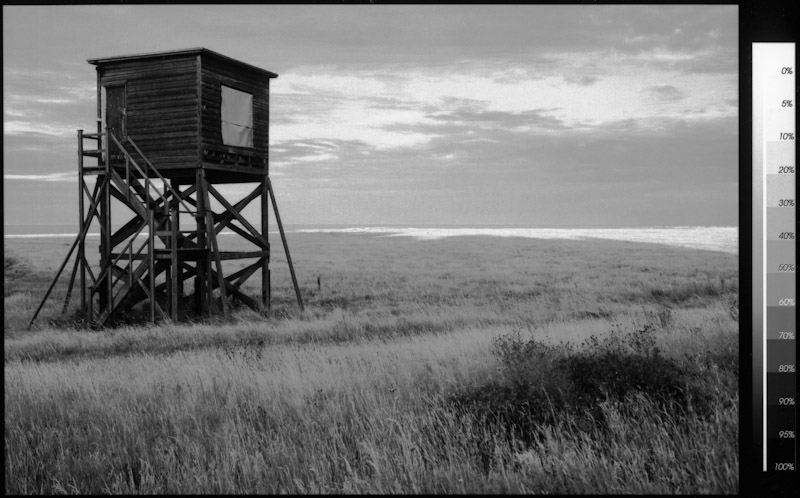
Contrast this with a print from the negative made using the DB method (shown at left). You should be able to see that the mid-tone separation is less good and that the contrast is a bit higher. The contrast shift is probably a result of the negative coloration, the reddish hue effectively working like a higher value filter to raise the contrast level of the variable contrast paper. The lack of tonal separation is a result of the curve applied in creating the negative.
The background is white in the DB print because there is an additional (and optional) black layer in the negative file, which you can turn on or off. In my version of the process I turn this layer off, leaving the negative surround clear, so it prints black.
You can click on these two thumbnails and have them open on the screen together so that a direct comparison may be made.
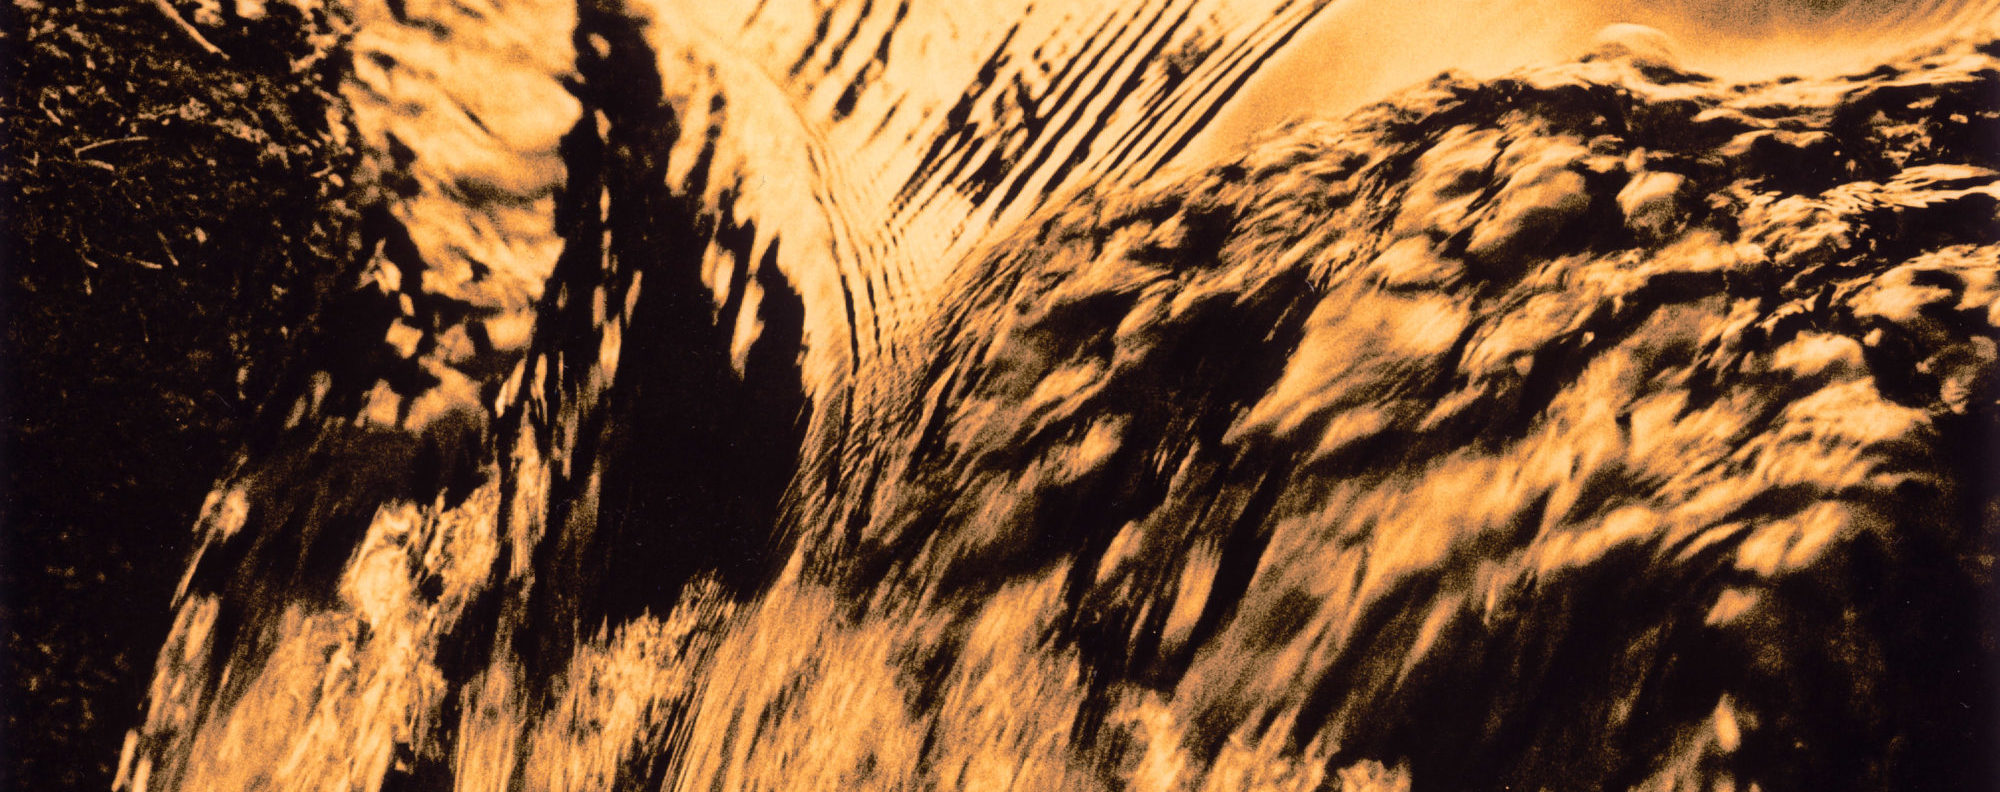
Finally, as my original intention was to create a digital negative for contact printing on paper for subsequent lith processing, here is an example of the result achieved by this method.
This is from a digital negative, contact printed on Fomatone MG Classic Glossy paper and processed in LD50 lith developer.
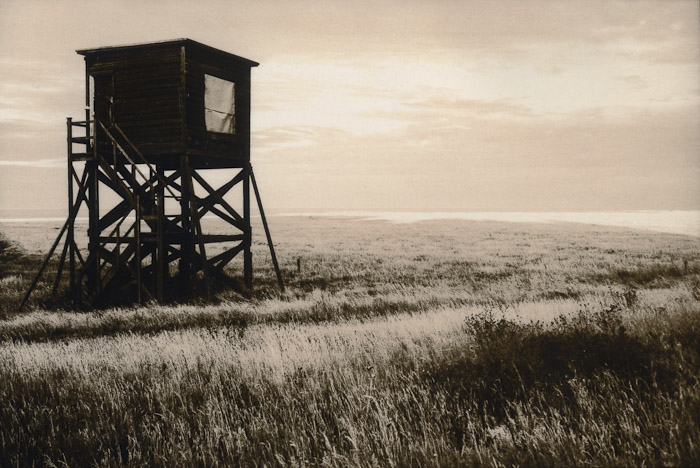
 And here is the digital image that I started with.
Afterword
The creation of ‘digital negatives’ from modern digital camera files has been an interesting exercise, albeit rather problematic for a worker in the UK due to the non-availability of materials. Hopefully this will be rectified in time, with companies like Silverprint trying hard to persuade the manufacturers that they should be allowed to import and carry stock over here.
As well as sourcing the material, you do of course also need to have a reasonably good printer, plenty of time available and the facility to make conventional prints on light-sensitive paper once you have your negative!
Overall though, if you find the quality and appearance of a print made on light-sensitive paper by either conventional or ‘alternative’ processes attractive and are prepared to spend the time, then the effort is worth it. With so much imagery produced on digital cameras it seems a pity that the results may only be expressed on similarly ‘digital’ materials. There is a certain uniqueness embodied in a hand-made print produced using traditional methods and chemistry that this hybrid work-flow attempts to exploit.
Roy Hammans
November 2009